How to deploy Fleet and Elastic Agent on Elastic Cloud Kubernetes
Episode #38: Unlocking the Power of Integrations by Setting up Elastic Cloud on Kubernetes with Fleet and Elastic Agent
I published my first article on Elastic Cloud on Kubernetes (ECK) almost a year ago at Dev environment with Elastic Cloud on Kubernetes (ECK).
Several of my readers and mentees have asked for an extended article to help them with installing integrations in Elastic.
So here in part 2, I will expand on the Kubernetes manifests to explain setting up Fleet and Elastic Agents.
But first, why do we need Fleet and Elastic agents?
If you want to observe resources that are scattered on different machines, you need to have one Elastic agent for each node. You also need policies configuring which packages to install and many other configs.
Those configs can change over time. Managing this complexity by hand can be overwhelming.
Fleet allows you to centrally manage all your Elastic agents, their configurations, and the installation and upgrading of integrations.
Why should you bother with integrations?
Elastic has almost 400 integrations on its page Elastic integrations.
You can observe anything from the same Kubernetes cluster where Elastic is running to Nginx servers, AWS cloud resources and anything in between.
For example, I wrote an integration for collecting access logs and metrics from Istio.
Installing and configuring Fleet and the Elastic agents is quite a complex setup when done manually but very simple when running on ECK.
In this article, I will present a simple setup that can be used in a dev environment to get started and experiment with Elastic.
Moving to a production cluster needs some improvements to those manifests that can be discovered from the official documentation.
This article is split into the following sections:
Source code, with links to a GitHub project and other learning resources
Elasticsearch, where I configure a single Elasticsearch node
Kibana, where I set Kibana to create the Agent policies used by Fleet and the other Elastic agents
Fleet and Elastic agents, where I configure the Fleet servers and the other Elastic agents.
Want to connect?
👉 Follow me on LinkedIn and Twitter.
If you need 1-1 mentoring sessions, please check my Mentorcruise profile.
Source code
The complete source code for this project is available at demos/eck.
Bear in mind that I assume that you are already familiar with Takskfile, direenv, devenv, Helm, K3d and Kustomize.
If you have never used Taskfile and you would like to learn it, head to Taskfile: a modern alternative to Makefile and then later to Supercharge Your Automation Workflows with Taskfile: Say Goodbye to Makefile.
If you want to learn how to use DevEnv to install 3rd party dependencies like kubectl, kustomize, helm and so on, head to Effortless Python Development with Nix.
If you have Taskfile, direnv and devenv already installed and configured, you should be able to setup the entire project by just running cd envs/eck; task.
You can find more information at demos/eck/Readme.md.
As I mentioned already in the past, I prefer k3d for setting up a multi-node Kubernetes cluster on my laptop. You might want to learn more about other options at Exploring Kubernetes Dev Environments in 2023.
If you need some extra help getting started with those tools or, in general, with Elastic products, feel free to reach out for some mentoring sessions at Giuseppe Santoro - Kubernetes Mentor on MentorCruise.
Elasticsearch
The Elasticsearch manifest is almost identical to the one from the previous article.
The only thing that changed:
increased memory and CPU requests and limits to speed up bootstrapping. It used to take up to 10 minutes to bootstrap this setup before I changed those limits. It now takes less than 2 minutes.
the version of the stack is now parametrised with an environment variable
$ELASTIC_STACK_VERSION. This placeholder is replaced with the actual value of the env variable by the toolenvsubstbefore the manifest is applied by kubectl.
Kibana
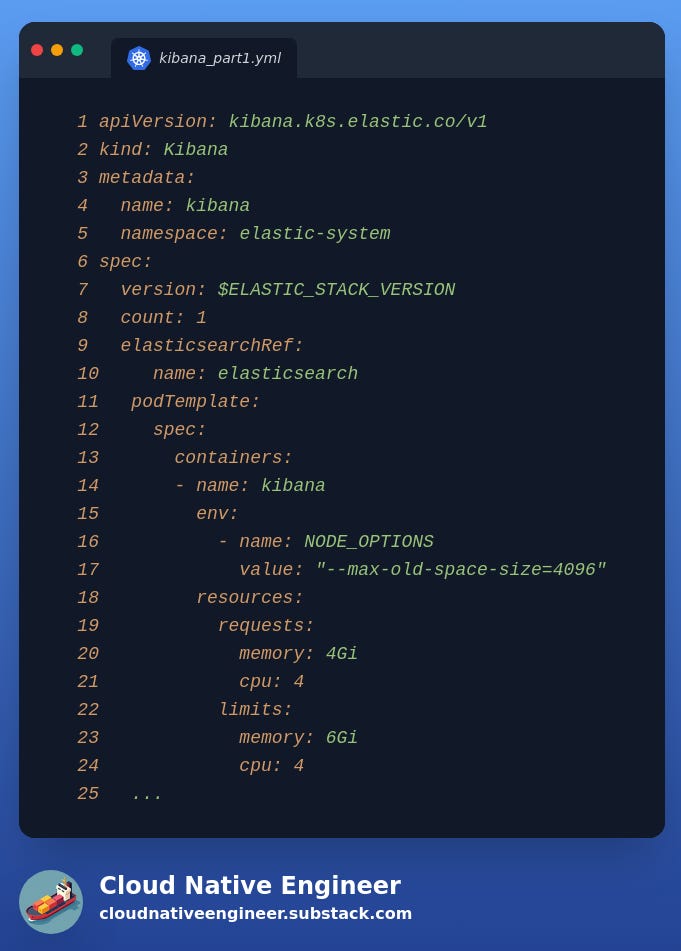
The manifest for Kibana is now much larger and too big to fit in a single screenshot, so we have split it into 3 parts even if the actual source code is still a single file.
Please refer to the full manifest at Kibana manifest.
Part 1 is the same manifest as in the previous articles. We have only changed the resource limit and parametrised the version similarly to the Elasticsearch manifest.
In part 2, we configure Kibana to talk to the Fleet server and Elasticsearch and we install some required Elastic packages.
Both Elasticsearch and Fleet server are referenced here by the Kubernetes services deployed by the ECK operator.
Part 3 is where most of the changes are. Here, we set the agent policies for the fleet server called eck-fleet-server and the other elastic agents called eck-agent.
As you notice, both of those policies have monitoring enabled to collect logs and metrics from the nodes where they are running.
While the Fleet server will have the fleet_server package installed, the other elastic agents will install the system package.
Fleet and Elastic agent
Fleet server is just a normal elastic agent with some extra packages and configuration.
That's why it uses the same apiVersion and kind of the other Elastic agents.
Some settings to keep in mind for the Fleet server:
mode: fleetfleetServerEnabled: true
As mentioned in the Kibana manifest, Fleet server uses the policy id eck-fleet-server.
Since we only need a single Fleet server, this pod is deployed as a Kubernetes deployment with a single replica.
Also the Fleet server needs to have pointers to Kibana (here called kibanaRef) and Elasticsearch (here called elasticsearchRef) via the respective Kubernetes resource names to correctly communicate with the other components.
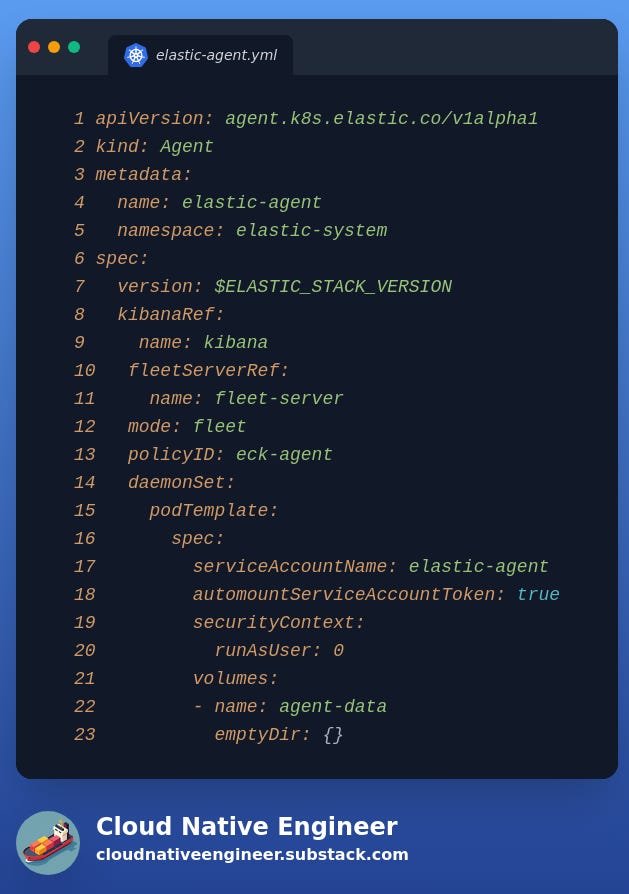
Similar to the Fleet server, the Elastic agents use the same apiVersion and kind.
From a configuration perspective, we can notice:
mode: fleet
As mentioned in the Kibana manifest, Fleet server uses the policy id eck-agent.
The Elastic agents are deployed as a DaemonSet, which means that Kubernetes will deploy a pod per node in the cluster.
In this setup, we have changed the Kubernetes cluster in K3d from the previous article to create a 3-node cluster to see multiple Elastic agents.
Each elastic agent needs to have pointers to Kibana (here called kibanaRef) and to the Fleet server (here called fleetServerRef) via the respective Kubernetes resource names to correctly communicate with the other components.
Finally, each Elastic Agent must have a volume mounted to store logs and metrics. Here, we are just using a locally mounted volume called agent-data created via the Kubernetes config emptyDir.


